|
Tech-Link 2.0 Support
| |
|
Last updated on: 11-24-17 |
Topic Index
Tech-Link 2.0 Software Installation
USB
Driver Installation
Users Guide
Modes
Menus
Tech-Link 2.0 Software Installation
- Download the Tech-Link 2.0 software by
clicking on the
"Download
Software" link above.
The file "Tech_link_20.zip" will be found in the specified download
location.
- Unzip the file using the windows
explorer. The folder "Tech-Link 2.0" is inside the zip file.
- Copy this folder "Tech-Link 2.0"
to the desired location such as the Desktop, C drive etc., using the windows
explorer.
- Using the windows explorer, browse to
this folder and create a shortcut to the executable
"Tech_Link_20.exe" using the windows explorer.
Copy the shortcut to your desktop.
- Microsoft .NET 4.5 (or later)
framework is required for Tech-Link to operate.
You can easily check which versions you have installed by viewing the
"Programs and Features" located in the Control Panel.
You can download it
HERE. If you are not sure, you can just install it anyway
since it won't hurt anything.
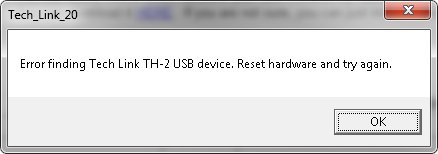
- To test the software installation,
double-click on the "Tech_Link_20.exe" shortcut.
You should see the error message window shown below at this point.
If not, re-check the above steps.
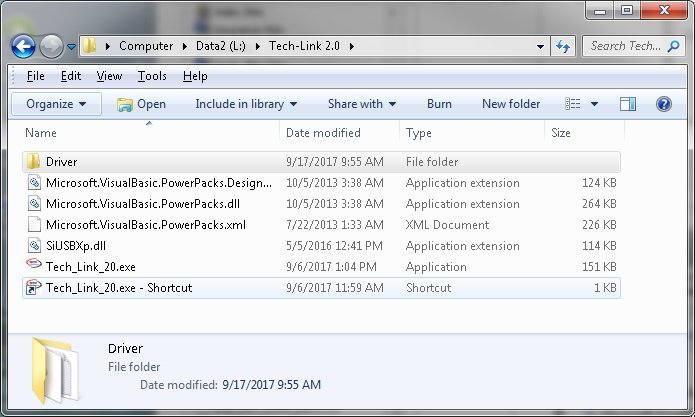
- Folders containing the TH-2 software
will also be added to the folder "Tech-Link 2.0". They will be
named TH, VT, UM etc.
For now, proceed to the next step
USB
Driver Installation.
| |
|
Screen shot of error message |
|
|
| |
|
|
|
|
| |
|
 |
|
|
| |
|
Screen shot of the new
installation folder |
|
|
| |
|
|
|
|
| |
|
 |
|
|
USB Driver Installation
Step 1
- For Windows 7 go to STEP 2 below.
For Windows 8/10 continue.
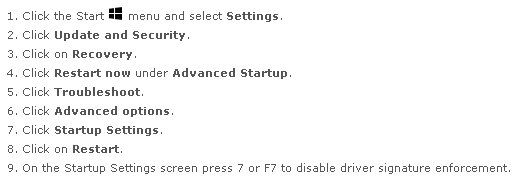
- Windows 8/10 enforces driver signatures
by default and must be disabled to install the USB driver.
The USB driver itself is supplied by Microsoft and is signed. Just
the "inf" install file is unsigned.
Use the following steps to temporarily disable driver signature
enforcement.
Note: youtube has many instructional videos on this subject.
3.
Your computer will restart and then you will be able to install the USB
driver.
On the next restart,
the driver signature enforcement will be re-enabled.
Step 2
- Using the windows explorer, browse to
the "Driver" folder under the main folder "Tech-Link 2.0".
- For Windows 64 bit, double-click
the executable "Tech-Link_2X_USB_Driver_Installer_x64".
For Windows 32 bit, double-click the executable
"Tech-Link_2X_USB_Driver_Installer_x86".
Depending on permission settings, you may need to run the executable as
the administrator.
This can be done by right-clicking the target file and selecting "Run as
administrator".
- This will begin the driver
installation process by starting the wizard.
Click - Next.
Click - Install this driver software anyway.
Click - Finish.
- This completes the driver install.
You can now proceed to download/install application software.
The software application download section can be found at the top of the
TH-2 XPR
Support page
Tech Link
Users Guide
Modes
There
are two main modes of operation Program and RT.
In Program mode you can load an application file, load/save a
settings file and modify the settings statically.
To enter this mode, start with all power turned off, connect the TH-2 to
the PC via the USB cable and run Tech-Link.
The mode status on the top right
of the Tech-Link window will indicate "Program mode".
You can now use the menu items under Program and Settings.
In RT mode you can modify the application settings in real time (RT).
You can see the
changes applied as you
make adjustments to the settings etc.
This mode is entered by first entering Program mode (see above), with USB
connected and Tech-Link active,
then turning on the TH-2 external power and radio power (Tx, Rx, servos etc.).
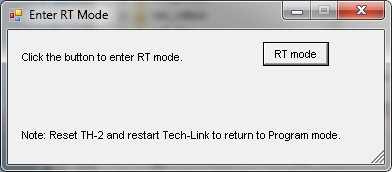
From the Tools->Enter RT Mode dialog click on the "RT mode" button.
The mode status on the top right of the Tech-Link window will indicate "RT
mode".
You can now use the menu items under Settings and Tools.
Note: RT mode can only be entered from Program mode.
Menus
Program
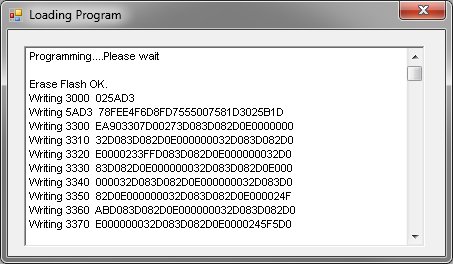
Load - Load an application program
Browse to the application folder under "Tech-Link 2.X" and select the
"hex" file. Click Open.
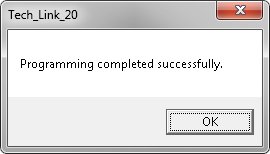
A window will open and will say "Programming.... Please wait"
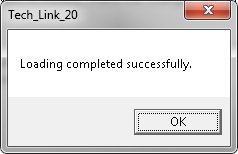
When completed, a message box will inform you.
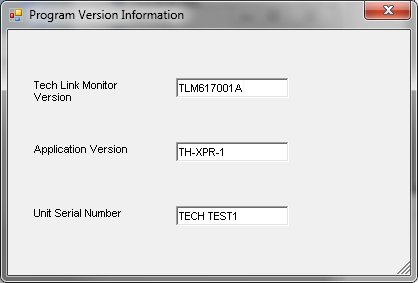
Version - Displays the Tech-Link monitor
version, application version, and unit serial number
Settings
Modify - Select the setting you want to
modify, make the changes and click Write to store the setting.
Load - Load a settings file
Browse to the application folder under "Tech-Link 2.X" and select the
desired "cst" file. Click Open.
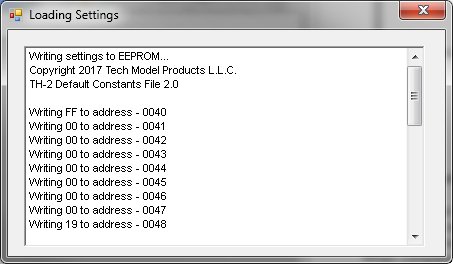
A window will open and will say "Writing settings to EEPROM...."
When completed, a message box will inform you.
Save - Save a settings file
Browse to the application folder under "Tech-Link 2.X" and enter the
desired filename. Click Save.
A window will open and will say "Saving settings to file...."
"Save complete. Errors = 0".
Close the window.
Version - Displays the settings file
version and application.
Tools
Enter RT Mode - Click the button to enter
RT mode. See "Modes" above for proper setup.
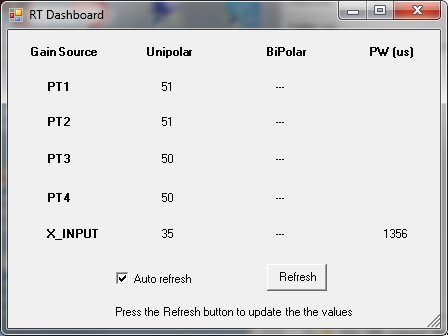
RT Dashboard -
This dialog allows you to see the values of the five external gain settings.
Depending on the application running, the values can have a range of
positive (0..100) or positve/negative (-100..100) numbers representing a
percentage.
In addition, the X input gain has the value of the "Pulse Width" in units
of microseconds
displayed. This is the actual PPM pulse width sent from the receiver.
| |
|
|
| |
 |
|
| |
Note: Output from TH-XPR-X
application shown. |
|
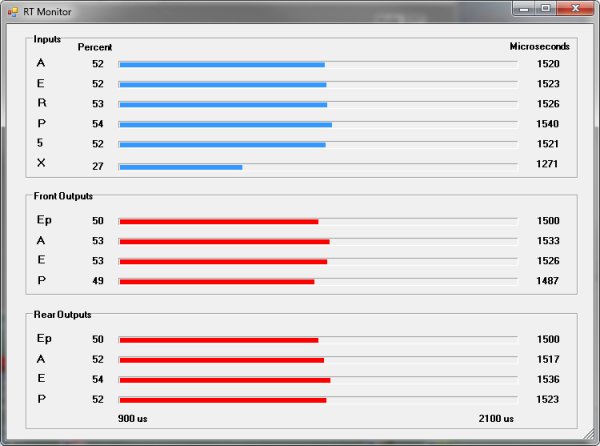
RT Monitor - This dialog shows a graph of the
inputs and outputs. It can help visualize the mixing and assist in
troubleshooting.
The left side shows the PPM pulse percentage based on a minimum of 1000
microseconds (us) and
a maximum of 2000 us. The graph has a range between 900 us and 2100
us.
The right side shows the PPM pulse width in microseconds.
Copyright © 2017 by Tech Model
Products LLC. • All Rights Reserved |